The Boeuf Bourguignon that started it all
September 29, 2011
This dish was years in the making. It inspired me to dive into French cooking which lead to learning simple technique and it was the main meal I most desperately wanted to try when (finally) getting my dutch oven. I would usually just jump right into learning a new dish, so what took me so long to attempt it?
Fear.
I compared this dish to running a marathon. Theres prep, skill and determination in seeing it through to the end. SO, inevitably…. I put it off. UNTIL a friend of mine shared with me her fool-proof recipe for the easiest Boeuf Bourguinon! I couldn’t wait to share this any longer.
Start by chopping 3 1/2 oz. of thick-cut, good quality bacon and 3 oz. of onions
In a heavy pan over medium heat, heat 1 tbs. of oil and add onions and bacon. Stir until browned
Once they’re nice and browned, remove them and set aside. Leave the extra fat in pan.

Next, pat dry all pieces of meat with a paper towel, making sure to get all the excess liquids out.

Add beef and brown on all sides (work in two batches if needed to avoid crowding)
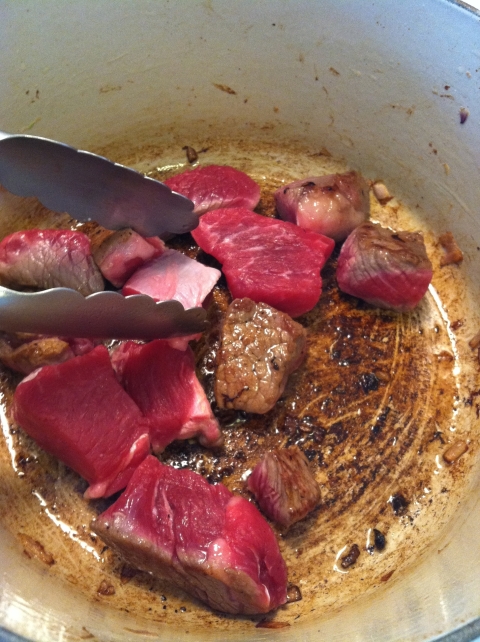
Sprinkle browned beef with flour, stir until browned and add 1 1/4 cup stock


Stir, scraping the bottom of the pan for all those flavors. Then throw in the rest of the ingredients: Reserved bacon and onions, 1 1/4 cup red wine and bouquet garni (1 bay leaf, 3 sprigs fresh thyme and 3 sprigs parsley, tied together). Season with salt and Pepper and simmer for 2 hours.
At this point, I put a movie in and just stayed nearby periodically checking in on my stew

30 min prior to serving, add in a cup or 2 of diced mushrooms

Then serve with your favorite side. My friend Nancy likes to eat this with Fries on the side.. which I find strange, but she’s Dutch so we won’t question it.

Boeuf Bourguignon
1 tablespoon oil
3 ounces onions or shallots, chopped
3 1/2 ounces thick-cut bacon, diced
1 1/2 pounds stewing beef, cut into 1 1/2 -inch pieces, patted dry
Scant 1/4 cup flour
1 1/4 cups any type of stock, hot
1 1/4 cups red wine
1 bouquet garni (1 bay leaf, 3 sprigs fresh thyme and 3 sprigs parsley, tied together)
Black pepper
3 1/2 ounces mushrooms, diced
Salt.
1. In a heavy pan over medium heat, heat oil. Add onions and bacon and cook, stirring, until browned. Remove them and set aside; leave fat in pan.
2. Add beef and brown on all sides (work in two batches if needed to avoid crowding).
3. Sprinkle browned beef with flour, stir until browned and add stock. Stir, scraping bottom of pan, then add reserved bacon and onions, the wine and bouquet garni. Season with pepper.
4. Simmer very gently for 2 hours.
5. Add mushrooms and cook 30 minutes more. Season with salt and serve. Or, even better, reheat and serve the next day.
Tip: If you want leftovers, double the recipe. This yields about 4-6 servings, but it’ll leave you wanting more!
NY Times No-Knead Bread
November 23, 2010
It happened! For my birthday, my amazing boyfriend got me a Le Creuset dutch oven in the gorgeous new “Ocean” color. It’s so pretty 🙂

If you read this blog at all, you can probably guess my level of excitement here. After my failed attempt with a previous purchase, I’m happy to have this beautiful piece in my kitchen and couldn’t wait to put it to good use! One of the first things I made with it was this very simple No-Knead bread.
This is really the easiest thing. You can even have your nearest 5-year-old make this one.
Start by throwing all your ingredients into a bowl.
3 cups flour, 1/4 tsp. yeast, 1 1/4 tsp. salt.

Next, add in 1 5/8 cups water (5/8 cups = 1/2 cup + 2 tbsp.). Get your freakishly large hands in there and mix everything real good.

Here’s the hard part. Ready?……….. Let it sit. For a REALLY really long time.
Go to sleep.
Go to work.
Come home.
Do some exercise.
Walk the dog.
Watch a movie.
Give yourself a mani/pedi.
Do ALL your Christmas shopping.
Do whatever you gotta do until your dough looks like this (after approximately 12-18 hours). See the bubbles surfacing? Yup, that’s a nicely rested dough.

2 hours before baking time, take the dough out of the bowl. Lay it on a lightly floured surface and fold it over twice. 1, 2 times. Dos. Not tres.

Let it sit another 15 minutes and place the dough on a cotton (not terry cloth) towel generously sprinkled with cornmeal, flour or bran.

Sprinkle the cornmeal over the top of the dough and cover with the towel for about 2 hours.

A half an hour before the dough is ready, set your oven to 450 with your beautiful dutch oven inside so it gets nice and hot. When the dough is ready, carefully take your pot out of the oven and gently pick up your dough and dump it in. Don’t worry if it’s not perfectly centered in the pot. It’ll work itself into place.

Cover with the lid and bake it for 30 minutes. Remove the lid, and bake another 15-30 minutes for a nice brown crust.
Then voila! You’ve got yourself some freshly baked bread.
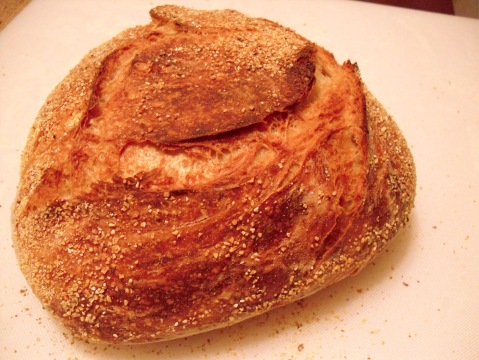
It’s beautiful, its delicious and nothing! I mean, nothing! will make your home smell better.
Here’s the original step-by-step video if the recipe still looks a bit complicated. But trust me, its super simple:
Sweet Potato Leek Soup
November 19, 2010

I love sweet potatoes!! I get so excited when I can make something with them that isn’t the usual thanksgiving casserole. Not that I don’t love that marshmallow topping. So when I finally saw them in the store, I may have gone a bit overboard by buying one too many pounds of the yummy stuff. I say that like it’s a bad thing.
This soup is so simple and surprisingly filling. It’s a twist on the classic French potato leek soup, minus all the butter or cream. Although, feel free to add that if you want a creamier texture. As much as I love butter though, I find when using a sweet potato vs. regular baking potatoes there’s really no need for it. It’s so good already!
Try this recipe during your busy weekend. I hear its supposed to rain 🙂
*Please excuse the awful exposures. It’s what happens when you cook (and take photos) at night.

Start by melting one large tablespoon of butter in a pot.
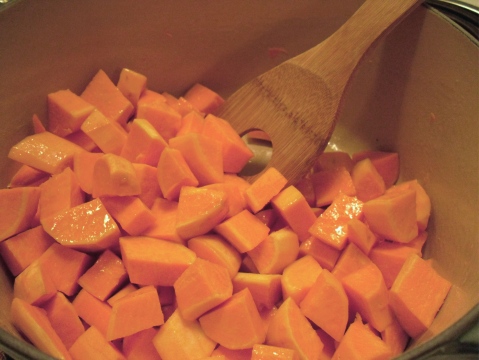
Toss in 1 pound of peeled, diced sweet potatoes and saute for a few minutes.

Grab your convenient stash of frozen, pre-sliced leeks from Trader Joe’s and sacrifice them for the greater good.

Saute them together in the butter and add 2 cups of water, 1 tbsp salt and any other seasoning that tickles your fancy. In my case, it was paprika, some freshly ground pepper and thyme.
Cover and cook for 30 minutes until the vegetables are soft. Puree with a handheld blender and serve. Easy peasy.

Sweet Potato Leek Soup
- 1pd. Sweet potatoes (approx. 3-4 large potatoes) peeled and diced
- 1pd. Sliced leeks (stems and all)
- 2 cups water
- 1 tbsp butter
- 1 tbsp salt
- 1tbs pepper
- 1 tsp paprika
- Sprig of thyme
Melt butter in pot. Add diced sweet potatoes and Leeks. Saute for a few minutes and add water. Cover and bring to a boil. Lower the heat and let it simmer for 30 minutes or until veggies are soft and can be squished (technical term) easily. Add in salt, pepper and paprika to taste. Garnish with a sprig of thyme.
Swiss Lemon Mousse w/the Inauens
August 26, 2010
My older sister recently married into a Swiss family that are not only endearingly sweet and embracing, but they are also some fabulous cooks! Anytime I am invited to get together with them I know there will be an impeccable spread, even if its something as simple as homemade pizza. When we got together for Fathers Day, Margaret (my sisters new Mother-in-law) brought a lemon mousse for dessert that I’ve never tried before! It was so delicious, I had to include it on my blog and get the recipe to share. Luckily for me, the recipe was easier for her to re-create than it was to translate from its German origin. She invited me into her kitchen to whip up another batch and I eagerly accepted the invitation with pen (and camera) in hand.
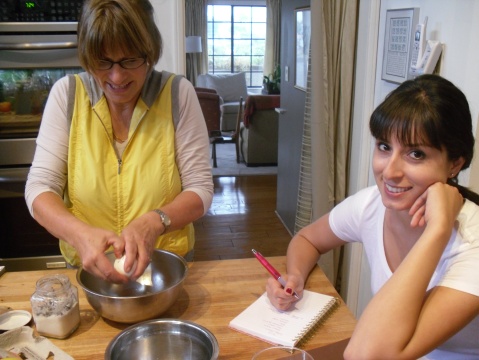
In a large bowl, beat 2 egg yolks with sugar until foamy. (set aside the egg white in a separate bowl)
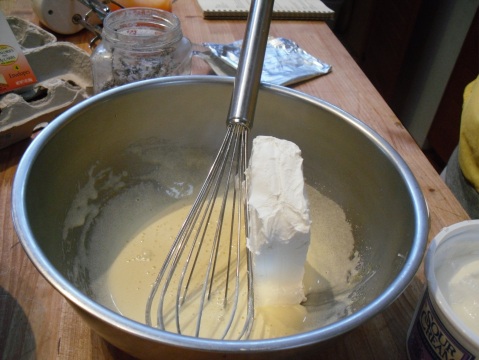
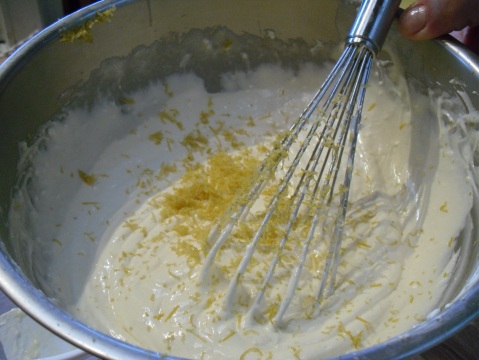
Mix in 8 oz of cream cheese until whipped and add the zest 2 whole lemons.
Mix in with 12 oz Sour cream and the juice of 3 lemons.
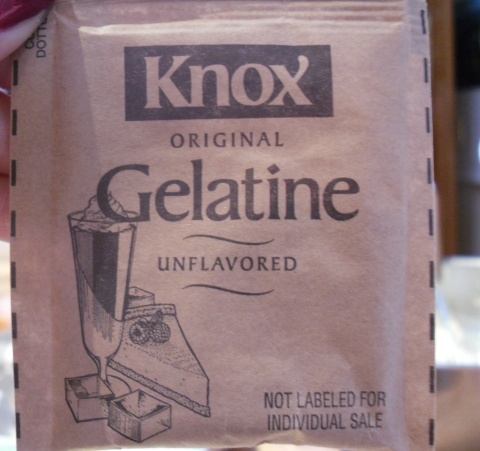
In a small bowl, combine 2tbs of water and a packet of gelatin. Heat on high in the microwave for about 1 minute or until boiling. Let cool and stir until gelatin dissolves.Add gelatin into the mousse and let it cool in the fridge for 15 minutes or until it starts to set.
In a separate bowl, whip heavy cream until you have small peaks and fold into the mousse.

Finally, beat the egg whites with a pinch of sugar until they stand firmly in small peaks and gently fold into mixture.

We got a little help from Rudy with this one.
I love this picture 🙂
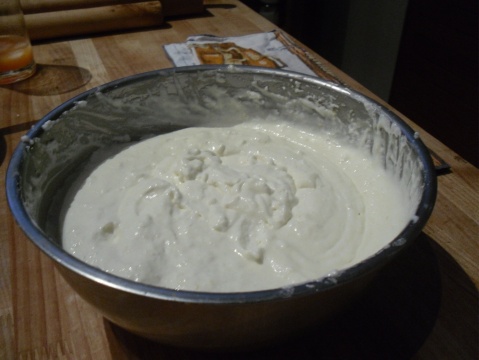
Chill for several hours, or until set.
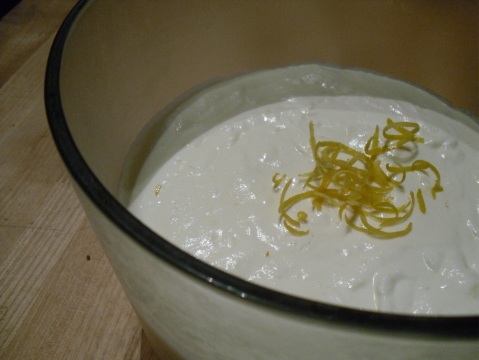
* Top with lemon rind or toasted almonds to serve.
Swiss Lemon Mousse
Ingredients:
-
8oz Cream Cheese
-
12oz Sour Cream
-
1 (1/4 oz) envelope unflavored gelatin
-
2 eggs, separated
-
2 Tbs. Vanilla Sugar
-
3 lemons
-
6 Tbs. Sugar
-
2/3 cups heavy cream
In a large bowl, beat the egg yolks with sugar until foamy. Mix in cream cheese until whipped. Zest 2 whole lemons and mix in with sour cream and juice of all 3 lemons.In a small bowl, combine 2tbs of water and gelatin. Heat on high in the microwave for about 1 minute or until boiling. Let cool and stir until gelatin dissolves.Add gelatin into the mousse and let it cool in the fridge for 15 minutes or until it starts to set. In a separate bowl, whip heavy cream until you have small peaks and fold into the mousse. Finally, beat the egg whites with a pinch of sugar until they stand in small peaks and gently fold into mixture.Chill for several hours, or until set. * Top with lemon rind or toasted almonds to serve.
Jammin’
July 2, 2010
This weekend I will be celebrating the 4th of July in Hume Lake with the bf and his familia, sleeping under the stars and (hopefully) learning how to catch a fish. Last year was the first time I took part in this tradition of theirs and this year I wanted to bring something memorable and homemade to share with everyone. Since we’ll be traveling a long way to get there I didn’t want to bring a cake or something that would be difficult to travel with (picture a car full of luggage, sleeping bags, camping stuff and a dog) so I thought Jam might be a good idea since it’ll be nicely sealed in its individual jars and I don’t have to worry about it getting ruined, eaten (by the dog or hungry travelers) or spoiled. I’d never made it before, but I thought to myself “How hard could it be?”
Well, I wouldn’t say it was easy, it definitely took some research and preparation to get the job done and it’s not something you want to just wing the first time around. I had a general knowledge of how I was going to pull this off, but in researching a bit more, I quickly found out that I knew nothing about making Jam. And why would I? I don’t harvest fruit or live in the country or even have a spot of dirt to grow fresh fruits or vegetables, so there’s never been a need to preserve what I had.
I learned there are steps that need to be followed very closely, and for me that’s difficult which is why I don’t like baking. I like to go with the flow and cook with whatever inspires me and what I happen to have lying around. Give me a step by step process and you lose me somewhere in all the details. Nonetheless, I was determined in making my fun little gifts and once it was all said and done, here’s the basics of what I learned:
- Be prepared. Have more jars ready than you think you’ll need.
- Do your research on proper Jammin. I found this site and this video really helpful.
- Buy a canning kit. I thought I could get by without one but I’m so glad I spent the few extra dollars on the equipment so I wouldn’t burn myself in the process. It turned out to be extremely essential.
- There are a lot of recipes out there for making Jam, but there are 4 key ingredients: Fruit, pectin (sometimes found in the fruit itself), sugar, and acid (from lemon/lime or the actual fruit).
- Pectin is made from apples and comes in different forms (powder, liquid, etc.). It’s used to help set the Jam but some recipes substitute it with apple juice (not from concentrate) or even a gelatin. I found that store-bought pectin is the fool-proof method for setting your Jam. If not used, you might end up with different consistencies; which is fine depending on personal preference.
Since I couldn’t find a box of Pectin at my local grocers, I opted for apple juice and followed this basic recipe for a Rhubarb Berry Jam and used blackberries instead for a tangier fruit flavor.
I was nervous that my Jam would either 1. Burn or 2. Not set. But I didn’t burn it (thank goodness) and it set just beautifully! With those fears aside, I can finally say…
I Made Jam!
Just saying that brings a sense of accomplishment one can only fully appreciate after you’ve lined up your beautiful jars of homemade jam, perfectly preserved and so glamorously dressed; ready to be stored or given away.
Heres my Rhubarb Blackberry Jam in all its glory! I even found this cute red gingham fabric to cover them with and added a blue ribbon to dress it up. I love how stylish and oh- so- Americana they turned out.
This experience has only made me want to make more of my own jam, preserves and jellies. I’d also like to start pickling my own Jalapeños and perhaps my moms salsa. If I can get that stuff to last all year it would be well worth the effort.
So does this mean im a Jammin expert? I don’t I’ve earned that title yet… but I still want the cute T-Shirt!
 PUMP UP THE JAM t-shirt – For all jammers! $22 at Pushcart Design.
Happy Independence Day Everyone!


